Showing posts with label copper. Show all posts

Tuesday, 31 May 2016

Backside of the Moon Copper Wire-Woven Pendant...

...finally got back to it on Sunday while sitting at the Nostalgia Show & Sale and then finished it today. This is the pendant I started well before Christmas -- you can see above on the masthead how far I got. Then the proverbial shite hit the fan and life became a monstrous blur for several months. One foot in front of the other, and don't look down. Then six or eight weeks ago or so I got absolutely deluged with typing which only let up on Friday.

Last week I'd set up a table outside to sort items for the Nostalgia Show and decided to leave it up all summer. Truth is, I'm too lazy to take it down and heave it back into the house. Today I cleared off accrued tree spit and whatnot and finished that pendant... almost. It looks okay in my hand, but as soon as I edited the photos I saw it wasn't reading, and figured out what needs to be fixed. I'll do that tomorrow. Let it percolate overnight in case I see something else needs tweaking. Of course I'd completely forgotten what I'd planned for the bail... and now there isn't one. That's something else I have to sort out. I think jump rings might wear away at the fine weaving wires, but I like the simplicity of the pendant as it is now. I may just string it on soft leather lace as is.

My outdoor studio, complete with deer flies, the big black ones with festively coloured eyes that you don't feel landing, only when they bite. For some reason they were biting me through my clothes, not my skin, which I found very strange.


Last December's photo, and Sunday's progress:


On Sunday, I'd remembered that I wanted to do something like that double curl at the bottom of the pendant, but the rest? Boh. So I started weaving and entwining... What I was definitely mindful of was producing a fully reversible pendant (this being the nominal front).


The back...


NO POINTLESS TWIDDLES this time, please and thank you! I did get quite ruthless in the end and hacked away.

Now to work:


Worked on hammering those lovely and elegant curvy curves that I admire so much online. This is when an anvil comes in handy, versus a plain bench block.


These are the two sides finished. This was supposed to be the back; yet again it looks better than the front. Not sure about that single curl in the lower right area... might disappear that tomorrow, too, or at least curve it into that woven bit more tightly. It's a structural piece that locks the two sets of weaving together. .


A little overexposed, but this photo of the front shows off the bead quite nicely. See that kind of "wave" dipping across the top of the bead? That's going to be gone tomorrow. It will wrap around and hide the wire coming out of the bead and I hope make the overall design stronger.


I'll post the finished pendant tomorrow. Might even sort out a bail. Thanks for stopping by!


Friday, 4 March 2016

Sleeping Beauty Turquoise Copper Wire-Woven Ring... A Sorta Kinda Tutorial...

I've been making plain little beaded wire-wrapped rings for kids for the past couple of weeks now, but I'm starting to get a little bored, and last night decided to try my hand at a wire-woven ring.

My usual technique to do anything is to start weaving a few wires together and see where they lead me. If nothing else, this gives me any number of specific questions to find the answers for, at which point I hit the books and Internet. There are many wire-woven ring patterns available (all the books I own have at least one ring tutorial in them) and there are copious YouTube tuts both free and for pay.

For a first effort this came out rather nicely, I think. The most interesting thing for me is how that tiny Sleeping Beauty nugget pops and holds its own -- looking twice its real size -- not overpowered in the slightest by all the weaving around it.


I wove a couple of inches in the middle of the wire I'd cut (3 base wires 20 gauge dead soft copper 7-8 inches in length, weaving wire 28 gauge). I picked the particular pattern just because I like it. It might be the Aztec weave. I checked for length on the mandrel, wove a bit more, then slid the bead on one of the wires.


Then I continued weaving 2 and 3 wires at either end, at the same time wrapping and overlapping the woven lengths around the turquoise bead just like making a rosette ring. I didn't want this to get too big and bulky, so once the turquoise was firmly ensconced, I STOPPED. No extra twiddles or anything. I trimmed and tucked all the ends underneath.


And there you have it, a copper wire-woven ring, size 6, Sleeping Beauty turquoise nugget.


You can see how red my middle finger was getting from the wire; my right hand was worse. Time to start taping my fingers to protect them. Or build up some honkin' calluses! (The black spots are from ancient hammer blows, maybe three or four years old.)

I've put the offer on Facebook here, first person who contacts me gets it (determined by time stamp) or it will be available at the market tomorrow. Guess I should put the price, eh? $30, plus shipping.

Thanks for stopping by!


Saturday, 10 October 2015

Wire-Woven Crab Agate Pendant...

"Crab" is another wire-weaving meditation done this morning at the market in between customers where I varied the weave from the first one I tried with the Cobra pendant (the modified soumak): instead of wrapping once, I wrapped twice, and developed a kind of organic zig-zag with gaps, to which I added lengths of wire which I first curled and hammered. In the interest of trying to stop being so freaking precise, I did all this adding and subtracting of wires randomly.

When I went to choose a pendant out of a bag of miscellaneous assorted pendants, the light hitting the weave pattern kind of mirrored the crab agate pattern (I think this is crab agate; someone please correct me if I'm wrong), so crabs, water, waves, undulation, and the wrap pretty much took itself over from there.


The back view:


This is the first time I'm doing a lot of hammering of dead soft copper. It gooshes out a lot more than half hard, and I need to keep an eye on that to keep all the hammered bits a little more equal, as the ones that aren't hammered enough look it. I'm seeing this more clearly in the photographs: I'm not getting the curves quite as swoopy and curvy and loopy as I'd like, and I'm still cutting off wire ends waaaay too soon, but it's coming -- and it's So. Much. FUN!!!

The other bonus is this is a great technique to use up all those orphan beads off the mixed strings of budget beads that seem always to have three or four really cool pendants that pretty much sell themselves as is, but the rest of them are.... kinda... meh.

As always, see me at the market on Saturday mornings, or email me for the availability of "Crab" or other items.

Thanks for looking!


Wednesday, 12 November 2014

Nephrite Jade, Carnelian & Black Cinnabar Necklace & Earrings...

Hah -- with reference to a discussion with Lisa Yang two posts ago, I had to take apart old jewellery to get one more carnelian bead for the necklace and then, while I was at it, tore apart an unsold bracelet to get two 6mm beads for the earrings. I figured I should make earrings now because the long bicone shape of the jade will be difficult to ever find again and typical customers in my mind's eye do like earrings.

'Scuse also the bad colour -- these really are a dark and dullish jade on the yellow side of the spectrum and the carnelian is a deep orange: not this Christmassy. I will try rephotographing tomorrow.


Necklace is 25.5" long. $125 for the necklace and earrings. I take PayPal and Square. Shipping and handling extra. Please email me for availability.

The inspiration to make this necklace was pure procrastination -- a highly underrated tool, at least in my creative arsenal -- and which came about as I was restringing and pricing bead strands for The Gem Expo. Hard to believe, in seven days I will be packing my truck for the show, and one week tomorrow, unless the forecast changes, I will be driving through snow and whatnot to get to Toronto. I'm really looking forward to being in Toronto. The drive? Mmmm, not so much.

Thanks for looking!

Tuesday, 3 June 2014

Happy Student, Happy Customer & Happy Me...

Here is some of the work (mostly perfecting her wrapping technique) that my student Nancy Mac has been been working on over the winter:


I was a very happy camper yesterday: I'd sold these earrings on Saturday at the market and then Monday I sold the necklace to Brenda, a fellow vendor at the Antique Mall. I'd only ever made the one pair of half-hoopish earrings but, while I like the shape, had no idea of their wearability. Brenda told me they're very comfortable and she's been wearing them non-stop. 


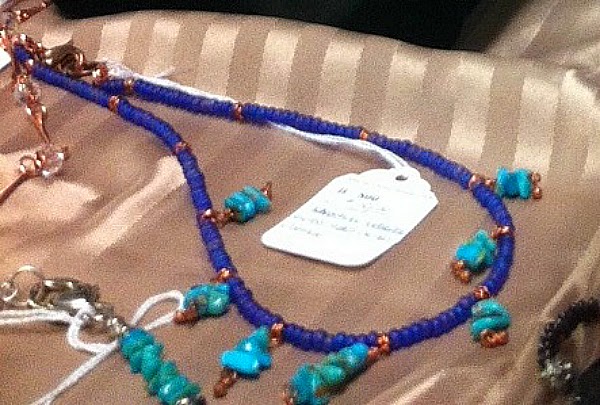
Those iridescent blue/purple seed beads are impossible to photograph, but for some reason when I photographed the necklace a few days ago through the glass in my showcase and under the ambient/artificial lighting, the colour -- and outrageous contrast -- came out a little better. 


Nancy Mac and I went halfsies on an unusual Baltic amber collar necklace with double-drilled slightly isosceles trapazoids that Brenda had at her booth. It's the double-drilling that keeps the individual pieces from flipping up out of position when wearing it, and an interesting sign of quality and workmanship that I've never run across before. 


My bits, divided up and mixed in with turquoise rondelles, will be wending their way to the Saturday market and/or showcase soon. I also have to finish off two strings of Roman glass, wire-wrap two pendants and string a heishi necklace -- all commissions. I'll be busy this week. I'll post pictures when they're done. 

Thanks for looking!

PS: As of this morning, my robin is back sitting on her nest. 


Sunday, 11 May 2014

New Venture... A Jade & Dzi Necklace in Progress... & What's For Dinner?

A little bit of back story -- a year and a half ago I met my new pal Nancy when she showed up at my table at the market looking for crystals, knowledge (hah), jewellery-making lessons... and in return she turned me on to estate sales. A lawn and garage sale veteran of umpteen years, I move to town, hit up garage sales and Goodwill, furnish a place; then get rid of most of the stuff the same way. Move on down the highway, lather and repeat.

But estate sales... ooooh. What a novel concept. Picker entered my vocabulary. Along with the jewellery showcase at the One of a Kind Antique Mall, I now have half a booth (#800) to sell my finds.

After getting up at 6:30 on a beautiful, sunny and finally warm Sunday morning (rain and thunderstorms predicted all this coming week) and driving a few miles down a deserted concession road, lined with more flip, flap, flop and flying red-winged blackbirds than I've ever seen at one time, these were acquired, brought home, washed, priced and went into my booth #800, today:


Of particular note is this score: Camp Life and the Tricks of Trapping by Gibson, 1881, 1st ed. Looks like this is the Canadian edition as the publishing info on the title page is a titch different and it's missing one illustration that I see in the online edition of the book. Tucked inside this particular book was a pamphlet on hunting regulations covering every province in Canada and state in the US for 1903. There are beautifully clear line drawings in the book: how to set traps, how to build a canoe and make camp, etc. I'd keep it, but I think my days in the bush are long gone.

I pulled the hand-carved stopper out of that "whisky" jug, and holy moley, the owner had brewed something fruity in there!


I also got this small table on wheels... thought maybe I could paint the top white... or black... it would make a chic-ish little coffee table...

Tonight for dinner... boned chicken thighs cut up and sauteed in butter and Szechuan sauce on a bed of basmati, green grapes for dessert, with leftovers for three days. Yummers.


I'm in a bit of a bind here. It's been feeling like this has been a year devoid of sales at all the venues, but imperceptibly things have been selling. I look at my table and it seems like all of a sudden there's nothing left to sell, particularly noticeable when people ask for specific items. Oopsies. Better get making new stuff, especially since I'm being moved out of my spot at the market by the coffee pot where I've been since time immemorial. Next Saturday I'll be across the room where Oliver's Farm usually is (half the market moves outside that day) and I'll have tons more display room. Guess I need something to display.

To that end, I started putting this necklace together yesterday. It was sold to me as jade, but... mmmmm, I dunno. Maybe it is. Maybe it isn't. Maybe the bead factory was pushing the envelope a little because, "Hey, this stuff's green; let's call it jade". It's purty though, and since green is one of those colours that for some reason has never done much for me (other than browny-greeny turquoise and Granny Smith apples... and, okay, green grapes), I rarely buy it, let alone use it. So, in the interest of being inclusive to all the lovers of green, because not everyone loveloveloves blue the way I do, here goes.


Green with scattered brown jade beads, handmade Ethiopian copper beads, a rectangular "Dzi" bead -- dunno if this shape would properly be called a Dzi -- but with 2 eyes, etched agate.

Note to new jewellery-makers: tiny jump rings are your friend. They can be placed unobtrusively to subtly spark and set off a long line of beads, the way I've done to "outline" the brown beads, and are also very handy at filling in the gaps that will occur between large beads and large and small beads when the necklace is being worn. It also cushions the wire so over time it doesn't develop an unsightly goink when it comes out of a large focal bead weighting down the bottom of the necklace.

The other thing I'm sure we've all noticed is that bead strings are getting shorter. In this case, I bought two strings, so there are enough beads remaining to make a bracelet and earrings. I'll post more pictures when everything is completed.

To all the mothers out there, Happy Mother's Day, and thanks for looking!


Sunday, 23 March 2014

Variations on a Teardrop Chain...

After seeing this chain on Pinterest this morning...

Tutorial for a handmade chain, from Lampwork Etc.
http://www.pinterest.com/pin/30962316162889083/, tutorial available here.

...I was meandering around in my mind as I often do wondering how I could improve on this. Because I tend to not like "open-ended" anything -- if for no other reason than I have long hair that gets caught in everything, not to mention if I'm wearing anything expensive or precious, it's guaranteed gonna get snagged and ruined -- I came up with this variation where the round loop carries to wrap and contain the teardrop end.

I have been making a lot of wire "bone" chains in copper and decided to try this new chain in tinned copper, my other go-to metal since I'm also using a lot of handmade, raw and matte stones, pewter pendants and coin silver anything these days. FYI, I was at Arton Beads in Toronto the other day and noticed that while a bit shiny it's a grey shiny: their white gold plated jump rings actually have a pewterish colour to them, which makes them a bit more blendy than regular silver-plated jump rings with the tinned copper wire.

After a bit of experimenting with the wire and pliers (I arbitrarily picked 20 gauge wire for this, and worked off an 18-24" piece of wire) this is what I came up with. At about 1/2", I found the little ones are too stumpy, although they'd make nice dangles for something with another bead hanging from them. The longer links forming the chain run from 5/8" to 3/4" in length.


This now kinda looks like barbed wire to me... which is interesting, because one of my intentions is to make more guy-ish jewellery and this would make a cool bracelet or choker/necklace for guys and not be that expensive. Looked up barbed wire images on Google and found this...

Bwcollage1
http://patentpending.blogs.com/patent_pending_blog/2004/11/barbed_wire_.html

...as well as all kinds of jewellery with barbs... so I guess I'm a little late to the party. Story of my life.

Tools:
Pretty simple. Also the hammering isn't that loud. Tinned copper wire is very soft and it only requires a few taps to work-harden the links.


Steps:
Pix are fairly self-explanatory. Let the wire poke out a bare 1/2", then wrap the wire around your pliers.


Bend wire straight back at a 45 degree angle, and 45 degrees to the plane of the teardrop loop.


Do a regular wrapped loop...


(After you've completed your first link and before completing your wrapping on the second link, don't forget to string the first teardrop to start the chain.)


Wrap three times. Cut the wire so that when you squeeze it in, the cut end will line up between the two parallel wires at the top of the teardrop shape. Try to goosh it down in between the two wires a bit. Use a file to smooth off any rough edges.


Ready to hammer...


...et voila.


Chain in progress & some variations:


I had some 6/0 seed beads handy, so I tried a few links with them. You'll need to straighten out the wires at the top of the teardrop so they're parallel and squash them flat a bit to get them both into the seed bead, then complete the wrap up top. Be careful to wrap firmly but not too tightly or you'll break the bead.


Then I got to thinking... my barbed wire has turned into a noose... This would make a nice earring.


This is the part of making something where things get a little fuzzy: as in, have I started to lose the concept? Does this still read as, say, a stylised barbed wire chain, or a noose design... or is it kind of a nothing now with the skulls included???


I'll send this to one of my guy customers and get his input.

What are you working on these days? Thanks for looking!


Thursday, 18 July 2013

Lapis Lazuli & Quartz Crystal Bracelets...

I was rather pleased with the way the glass skull looked combined with the enhanced lapis lazuli the other day, but fearing that people might not share my love of skulls I made two more bracelets in the same style but substituted faceted quartz crystals for the skull.

Enhanced lapis lazuli, pewter coin flower beads, brass spacers and a faceted quartz crystal bead.
7-3/4" in length, $55.00.


Enhanced lapis lazuli, pewter coin flower beads, pure copper spacers and a faceted quartz crystal bead.
8-3/4" in length, $69.00.


If you are interested in buying or commissioning a bracelet, necklace or earrings -- or the beads themselves -- please email me.

I hope everyone is staying cool these few days until the heat breaks -- which is supposed to be on Saturday. There have been some pretty interesting stories in the news this week about the ferociously high temperatures we're experiencing -- at the same time as it got to below freezing in Alberta. This is the latest:

A cop bakes cookies in his car while he's at work:
http://www.thestar.com/news/gta/2013/07/17/toronto_weather_cop_bakes_cookies_in_his_car_during_heat_wave.html

A few years ago, they tried to roast a roast in a car. Scary hot temperature inside the car even if it wasn't quite successful:
http://www.thestar.com/news/2013/07/17/in_car_roast_beef.html

If this infernal heat is getting you down, meditate instead on cool ocean breezes. This picture of the Islay Mist was taken July 5th by my brother's friend -- who my brother was picking up. Talk about customer service. Contact my younger, smarter brother Jim to book a cruise off the west coast and go hang with some whales...


See you at The Gem Expo at the Hyatt in Toronto next Friday, Saturday and Sunday. Thanks for looking!

Friday, 14 December 2012

Little detour, big earrings...

I got distracted when I was halfway through making something or other (happens to me ALL the time), had a blinding flash and made these earrings. Found the handmade sterling, turquoise and copper bead earwires in my market office box which I had taken off another pair of earrings to lessen the price who knows how long ago. But they work perfectly here. Nice little pure copper dangles on the headpins... or maybe these would be called dangle pins.


This second photo is pretty close in colour to the Kingman turquoise:


I've finally found a good spot to rig up my ring mandrel. I'd had it C-clamped to my big plastic folding table, but was forever impaling myself getting up or sitting down, not to mention the mandrel was always breaking free of the clamp, nor did I really have room to wrap the wire as the clamp was at a forward angle along the front of the table instead of -- drum roll, please -- along the other edge of the table. Sigh... this has only taken me six months to figure out.


I guess I could actually move the mandrel forward, too. I'll see how it goes on the first ring. The grey mark on the paper sleeve has size 10 marked on it -- the size I mainly work around when making guy rings. For those who've never tried making rings, it's wire-wrapping around the ring itself that makes the ring smaller. You don't want to try to make a ring the exact size you need right off the bat. Make it a bit smaller than you need -- because if it ends up larger than you want, you can't make it smaller. Then use a hide mallet on the steel mandrel with the ring sizes on it to gently bash the ring down the mandrel to get the exact size you need.

While poking around looking for those Kingman rondelles, I found my copper clasps and pewter birds that I've been looking for all week in the first two places I looked just now. I guess that's the secret to finding lost things if retracing your steps doesn't work: look for something entirely different.

Okay -- now to make some rings, and then... clean up? Pack up? Go to bed early for once? 3:30 a.m. will come faster than fast. Eyes crossed it's a good market tomorrow!

Thanks for looking.